Monday, November 14, 2011

Infinity Scarf

I have been seeing these scarves everywhere lately. I love them. Here is my first shot at making one. I didnt use a pattern. I just made it up from single crochets then attached the two ends. I used a jumbo hook. It didnt take long at all. I am making a few more. Basically what I did was make a chain to my desired width, then did single crochet until it was long enough. It made a cute square pattern when it was stretched. Cool huh?


Pinterest Creation

This is my first attempt at a project from Pinterest. I was anxious at first because it requires the sewing maching and I hate my sewing machine. Well, I hate it because 1. I have no patience 2. I taught myself how to use it so technically I am sure I am not doing it right 3. I hate having to get it out and setting it up because I am lazy.

So, I decided to try to be positive about the whole thing and try it. It was going rather smoothly until my bobbin ran out of thread which really ticked me off. I was doing good, trying not cuss until that happened, oh well. 

Here is a pic of how it was supposed to look.
And... here is mine
It didnt get as ruffly as the original one but I am pretty pleased with how it turned out. I think it was the type of material I used.

Here is the link with the directions
http://www.pinklemonade-blog.com/2011/09/ruffle-scarf-tutorial.html

Saturday, November 12, 2011

Tutu Dress Tutorial

As I posted before, I made some pretty cute Halloween costumes, if I do say so myself! Anyway, I thought I would post a tutorial on how I made them. This is my first tutorial so bear with me. It is really hard to explain things when you are used to just doing them, but here goes. Please message me if you have any questions or if I have just plain ole confused you. Also, forgive the pics. :)

Elmo and Cookie Monster Outfit Tutorial


Supplies

Crochet tube top (I found mine on EBay $3.95)

3-4 Rolls of tulle of desired color 6 x 25”

¾ inch non roll elastic (desired length equal to waist)

Felt

Thread

Stick Pins

Ribbon – 1 inch wide

Tutu

  1. Begin with making the waistband using the elastic. Cut to desired measurements of waist and sew together.
  2. Cut the tulle into strips 26” long.
  3. Attach the strips to the tutu. Fold the tulle two times to make it skinny, and then fold again in half. Making sure it is even.
  4. Holding the strips, insert folded side down in elastic; bring ends of tulle through the loop. Hold the knot and pull until snug. Continue this all the way around covering all of the elastic. ( I slide the pieces together while added tulle to make the tutu full and so none of the elastic shows)
  5. After the elastic is fully covered, we are going to another layer of tulle to make tutu super fluffy. In the knots made by the previous tulle, fold tulle same as before. Attach the tulle to the previous knots in same manor as before. Continue all the way around on each of the original tulle strips.
  6. Set tutu aside for now. We are finished with tutu.
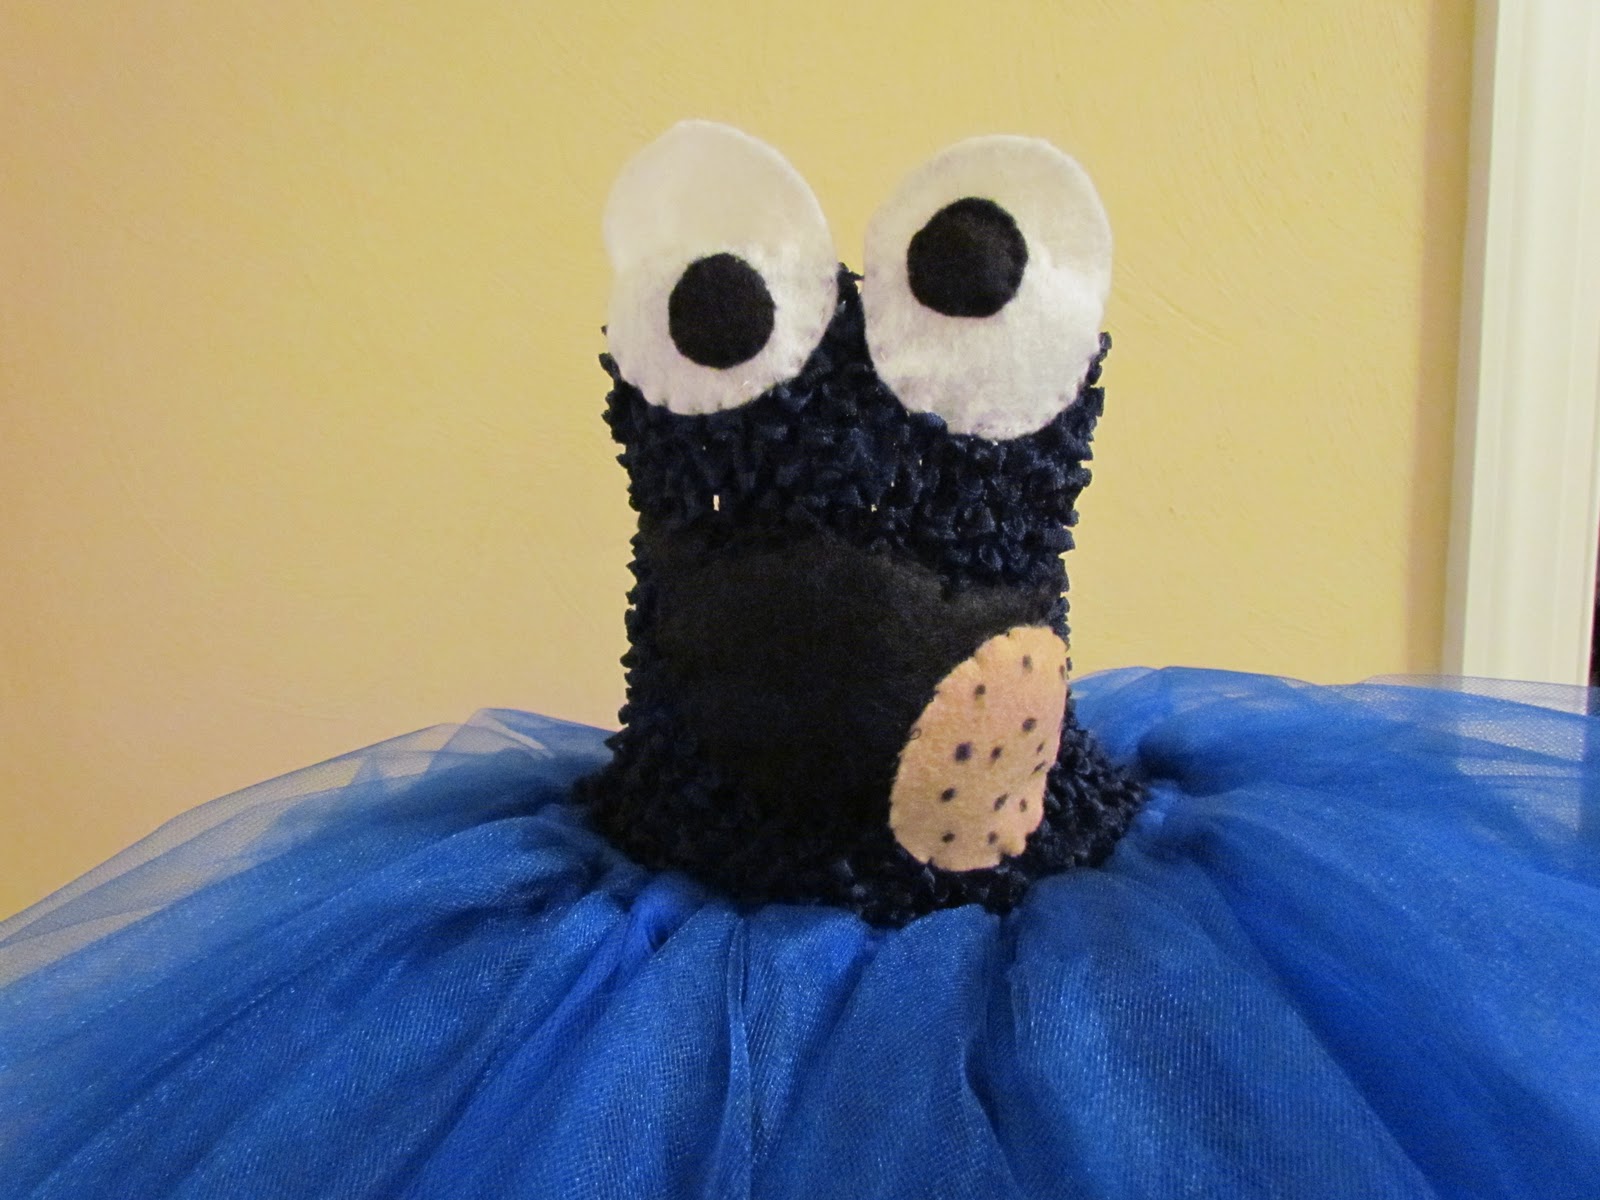


Top (Face)

Since the top is already completed, all you need to do is attach the face to it.

  1. Find the picture of the character that you want to make. I searched under images on yahoo, zoomed in on the image. Then I held a piece of paper up to the screen and traced the eyes, nose, etc. (Very artsy I know!) or you could cut it free hand if you are really good.
  2. If you traced the face on the computer like I did, cut the pieces out and attach them to the felt sheets. Use a pin to attach to felt and cut around paper.
  3. Place the pieces of your face to the crochet top and attach with pin to hold in place.
  4. Sew pieces of felt face to the crochet top with coordinating thread.
  5. Yay! Now you are done with the top!


Attaching Pieces Together

Attach the bottom of the crochet top to the top of the tutu with pins. I turned the tutu inside out and connected the shirt to the inside of the waistband. (Kind of like tucking in the shirt into the tutu)

Sew the top to the tutu.

Flip the outfit right side out.

Cut the coordinating ribbon desired length to make a halter tie around the neck. Fold ribbon in half, and then sew onto top of crochet top to hold the dress up.

Fluff up tutu and Ta Da! You have a tutu dress costume!


Monday, October 31, 2011

Final results of the Halloween Costumes!

Here is a pic of the Elmo and Cookie Monster costumes I made. They look so cute on the girls! I will share more pics later. Message me for info on how to make them!


I have posted a tutorial on how to make these on my next post!

Scarfs Galore

Here are the additions to my scarf family! You can find them on Etsy!
http://www.etsy.com/shop/MajikThreads


Monday, October 24, 2011

Panthers scarf

I had a sick day today. Which means, I didnt go anywhere and was supposed to rest. I cant sit still so I decided to craft. I had a request for a Carolina Panther scarf like the Hokies scarf I make. Well here it is. I am pretty please with it. I love the colors. I was rather productive on my sick day! This is in my Etsy store if anyone is interested!


Wednesday, October 19, 2011

Halloween Costumes. Take 1

So, my amazing client Kim, asked me to make her 1 year old, twin girls Halloween costumes. She sent me pics from Etsy of an Elmo and Cookie Monster tutu costume. Well, since I am the tutu master, I agreed!

Once I got all of the materials, it really was easy and kind of fun. I had to re-do the faces but that wasnt a big deal. I was really please with the way they turned out. I might make some more, who knows? I like the whole tutu dress idea. I am also in the process of making my nephews Halloween costume so stay tuned!

These pics dont show the ribbon that ties around the neck that is a halter type style.


Not too shabby for my first time, huh?

Monday, September 26, 2011

Yarn Scarf

I made these scarves to sell on Etsy. I thought they would be easy to make and super cute. I for one as a gift a few years back for Christmas, not Hokie though.

I made them in Hokie team colors. They turned out so cute. But, they are a pain to make. Getting all of the yarn in stock, cutting the yarn and ribbon. trying to untangle it, etc, etc. So these will probably be the last ones I make. Enjoy!


Monday, September 19, 2011

Decorated Double Crochet Purse

This is the purse from the double crochet purse that I posted the pattern for on this blog. I decided to add some flair to it for my neice. I added some paper flowers that I made by attaching brads to hold them together. You just put the brads in and attach them to the purse. I thought it was fun and great for a little girl!


First attempt at a sweater

I have been working on this sweater off and on since May. I was really excited to make it. So I was a little disappointed when I finished :(. It turned out a bit smaller than it was supposed to be. Also, it was hard to hide the seam when I stitched it together. Both my fault! So at least my niece, Emma Grace was dying for it to be hers. At least she likes my crocheting skills or lack there of.

I added some flair and made it look the best it could considering the circumstances. Here is the link for the pattern and what it was supposed to look like.
http://www.ravelry.com/patterns/library/simple-crochet-shrug-2


Monday, May 9, 2011

Baby Hats

My friend Corey is an amazing photographer. She gets the cutest pics of babies! This is actually her little one doing the modeling for me in 2 hats that I made. This is my little start in baby wear!

Thursday, April 7, 2011

Crocheter's Friend

My awesome client, Lawre made me this cool crochet hook holder. She makes them and sells them. I love it! The colors are great and it has so much room to hold everything. There are slots for all of your hooks, with labels, and a zipper pouch for scissors, etc. I was so excited to get it and load my hooks in it! You can check out her website http://www.lawreslaine.com/ or visit her etsy store Lawres Laine